The Kinetic Trigger of Intermittent Electrical Resistance
When your vehicle encounters a pothole, the physical jolt does more than stress your suspension; it serves as a violent diagnostic test for your entire electrical architecture. In a modern automotive ecosystem, electrical continuity relies on precise tension at every connector and terminal. A flickering dashboard is rarely a failing bulb; rather, it is usually a sign of an intermittent open circuit caused by mechanical shock. This phenomenon occurs when a loose connection or a compromised ground wire momentarily loses contact, interrupting the flow of current just long enough for the instrument cluster to reset or dim. This disruption often signals that the integrity of the harness has been compromised, requiring immediate auto repair to prevent a total system blackout.
Why a Compromised Ground Path Is Your Car’s Silent Enemy
Most amateur mechanics immediately suspect the battery or alternator, but professional technicians know to look at the ground straps first. According to standards established by ASE (Automotive Service Excellence), maintaining a low-resistance path to the chassis is critical for sensor accuracy and module stability. If a ground wire is corroded or slightly loose, a pothole can break that fragile connection. It is essential to spot a bad ground wire before the resulting voltage spikes cause permanent damage to sensitive ECUs. Grounding issues are notorious for creating ‘ghost’ symptoms that appear and disappear with road conditions.
How Do You Isolate Vibration-Induced Shorts From Component Wear?
Distinguishing between a dying alternator and a loose wiring harness requires a systematic approach to vehicle diagnostics. If the flicker is strictly tied to physical impacts, the issue is mechanical—likely a harness rubbing against a metal bracket or a backed-out pin in a connector. However, if the dimming occurs under load, such as when your headlights are on, you may be facing a failing voltage regulator. You should never ignore a flickering dashboard light, as these micro-outages can eventually lead to a total transmission control module failure or engine stalling during critical driving maneuvers. Professional oscilloscopes are often needed to ‘catch’ these millisecond drops in real-time.
The Impact of Low Voltage on Sensitive Digital Networks
Modern vehicles operate on complex multiplexing systems where multiple modules communicate over a shared data bus. Even a millisecond of power loss can desynchronize the ‘handshake’ between the Body Control Module (BCM) and the Instrument Cluster. When you hit a bump and the lights dance, you are seeing the system attempt to reboot in real-time. This instability can lead to ‘U-series’ communication errors that baffle generic scanners and may even affect how your vehicle shifts or responds to throttle inputs. If your vehicle’s electronics seem to have a mind of their own after a rough road, it is time for a professional car service that specializes in electrical tracing. Have you checked your main battery terminals for tightness lately? Contributing your findings to a diagnostic specialist can prevent a minor loose bolt from becoming an expensive electronic replacement.
Stop Chasing Shadows and Start Probing the Fuse Box
The Power Distribution Center (PDC) acts as the heart of your vehicle’s electrical routing, yet it is frequently ignored during troubleshooting. Over years of operation, moisture and vibration can lead to microscopic cracks in the solder joints or corrosion on the underside of the junction block. When your car hits a sudden dip, these brittle internal paths can momentarily separate. This is often the real reason why your dashboard lights flicker when you hit a bump, rather than a simple loose bulb. Sometimes, the disruption is so localized that it only affects specific circuits, such as the hidden fuse that controls your fuel pump, leading to a engine stumble that accompanies the visual flicker. Inspecting the underside of the fuse box for the tell-tale ‘green crust’ of copper oxide is an expert-level move that solves many ‘unsolvable’ electrical mysteries.
Is Your Voltage Drop Hiding Behind a Clean Battery Terminal?
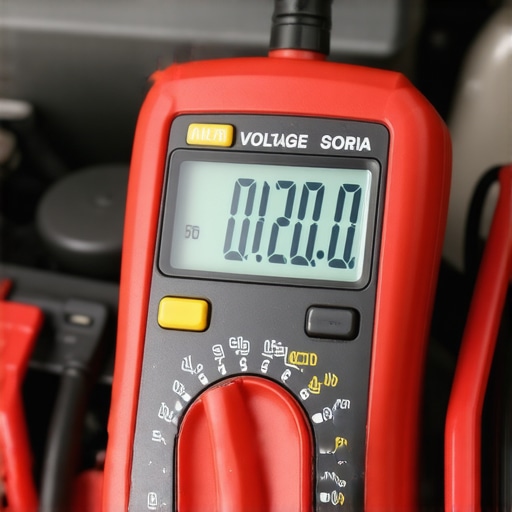
A common mistake in DIY repair is assuming that a lack of visible corrosion equals a healthy connection. Expert technicians rely on voltage drop testing to see through this illusion. A battery terminal might look brand new but suffer from a poor crimp or internal resistance where the wire enters the lead clamp. According to research from SAE International, the governing body for automotive engineering standards, electrical connections must maintain specific torque and surface contact to withstand the 3G mechanical loads common in daily driving. If those standards aren’t met, a pothole provides enough force to bridge or break the connection. You can test your car battery with a simple headlight trick to see if the drop is universal or isolated. If the headlights stay bright while the dash flickers, you have successfully isolated the fault to the interior harness or the hidden ground wire that causes intermittent starting issues.
Thermal Expansion Meets Mechanical Shock
It is vital to understand that electrical resistance is a dynamic variable influenced by temperature. As your engine bay heats up, metal components expand, and the resistance in a compromised wire increases. A connection that is barely holding on will often fail only when the car is hot and then subjected to a physical jolt. This thermal-mechanical synergy is why some owners find why your car battery dies every time it rains or why the dash only acts up after an hour of highway driving. Using the 5 dollar tool for finding electrical shorts in minutes can help you probe these wires while they are under thermal stress. Have you noticed if your electronics behave differently after the car has warmed up? Documenting these patterns can save you hundreds in diagnostic fees at the shop. By identifying whether the flicker is heat-dependent, you provide your technician with a massive head start in locating the specific harness section at fault.
Identify Harness Chafing Before It Becomes a Fire Hazard
The most dangerous cause of a flickering dashboard is a wire harness that has rubbed through its protective loom. Over time, engine vibration causes the harness to saw against metal brackets or the firewall. This creates a short to ground during bumps, which can lead to localized melting or even an electrical fire if the circuit protection fails. Identifying these friction points requires a keen eye for shiny spots on the chassis where a wire has been rubbing. If you find a compromised wire, it is a sign that your vehicle needs a comprehensive electrical audit to ensure long-term reliability. We invite you to share your own experiences with ghost-in-the-machine electrical issues in the comments below, or check out our guide on finding top auto repair techniques every car owner should know to stay ahead of these complex failures.
Listen for the Click of a Dying Relay
While most drivers focus on wires, the mechanical relays tucked inside your junction block are often the true culprits behind a flickering instrument cluster. A relay is essentially an electromagnetic switch; it uses a small current to close a larger circuit. Over hundreds of thousands of cycles, the internal spring tension weakens. When you hit a significant bump, the physical inertia can momentarily pull the contact arm away from the terminal, causing a ‘chatter’ effect. This isn’t just a flicker; it is a rapid-fire sequence of connects and disconnects that can send inductive spikes back through the sensitive electronics. According to the Automotive Service Association (ASA), relay failure is a leading cause of intermittent power loss in vehicles over seven years old. If you hear a faint clicking sound coinciding with your lights dancing, you likely have a relay that has lost its mechanical integrity and needs an immediate auto repair intervention.
Can a Faulty Ignition Switch Mimic a Pothole-Induced Short?
Yes, and this is one of the most frequently misdiagnosed issues in modern vehicle diagnostics. The ignition switch is a heavy-duty rotary or push-button component that handles the primary ‘Run’ signal for the entire vehicle. Inside a traditional keyed switch, heavy brass contacts slide across each other. As these wear down, they create ‘dead spots’ filled with metallic dust and old lubricant. A pothole provides just enough vibration to move the internal slider into a high-resistance zone for a fraction of a second. The car doesn’t turn off, but the voltage to the dashboard drops significantly. This is why some people find that wiggling their key chain causes the same flicker as a rough road. If your car has a heavy set of keys, the constant pendulum motion accelerates this wear, eventually requiring a specialized car service to replace the ignition cylinder or the electrical switch block behind it.
Protect Your Data Streams from Mechanical Interference
Modern cars rely on the Controller Area Network (CAN bus) to manage everything from your speedometer to your transmission shift points. This network operates on very low voltage differentials. When a physical jolt causes a loose power wire to arc against the frame, it creates Electromagnetic Interference (EMI). This ‘noise’ can scramble the data packets traveling on the CAN bus, causing the dashboard to freeze, reset, or display a Christmas tree of warning lights. It is a digital manifestation of a mechanical failure. To combat this, manufacturers use twisted-pair wiring to cancel out noise, but if the shielding is compromised, your car becomes vulnerable to every bump in the road. Finding these interference points requires more than a wrench; it requires a deep dive into the top auto repair techniques involving shielded wire repair and proper signal grounding.
Why Dielectric Grease Is Often Misapplied in Modern Circuits
There is a dangerous myth in the DIY community that more grease equals a better connection. In reality, dielectric grease is an insulator, not a conductor. Its primary purpose is to seal out moisture and prevent oxygen from reaching the metal terminals to stop corrosion. However, if you pack a high-density connector with too much grease and the terminal tension is already weak from years of vibration, the grease can actually facilitate a ‘hydroplaning’ effect for the electrical contact. When you hit a bump, the grease moves, and the weak terminal loses contact because it was never truly biting into the metal.  Professional technicians use it sparingly on the outer weather seals rather than the pins themselves. If you have recently performed a car battery test or cleaned your connectors and the flickering started shortly after, you may have inadvertently insulated your circuits against their own power supply.
The Role of the Body Control Module in Power Stability
The Body Control Module (BCM) acts as the brain for your car’s interior electronics, including the lighting and the cluster. It monitors voltage levels constantly to protect the vehicle from shorts. If the BCM detects a sudden, sharp spike or drop—like what happens when a loose wire hits the chassis during a pothole—it may enter a ‘protection mode’ where it temporarily cuts power to non-essential systems to prevent a fire. This is why your dash might stay dark for several seconds after a hit before coming back to life. It is the computer, not the wire, doing the work. Determining if your BCM is overreacting or if the hidden ground wire is truly failing is the next step in mastering your vehicle’s electrical health. We encourage you to share your diagnostic findings with our community below; have you ever noticed a specific sequence of lights during a reset?
Evaluating Terminal Tension with the Drag Test
To truly solve a bump-related flicker, you must move beyond visual inspections and perform a ‘terminal drag test.’ This involves using a spare male pin of the exact same size to test how tightly the female socket in a harness holds onto it. If the pin slides in and out with no resistance, that circuit will fail every time you hit a bump, regardless of how clean the metal looks. Over time, the tiny copper ‘fingers’ inside the connector lose their spring. This loss of mechanical grip is a silent killer of automotive reliability. Many owners end up replacing perfectly good alternators when all they needed was a 50-cent terminal pin replacement. As we look deeper into the architecture of the harness, we must consider the impact of wire fatigue at the entrance of the connector…
…fatigue at the entrance of the connector. This localized stress occurs because the copper wire remains flexible while the terminal pin is held rigid within the plastic housing. Over thousands of miles, the microscopic strands inside the insulation begin to fracture one by one. Eventually, the wire is held together by only a few remaining strands, creating a bottleneck for current that generates excessive heat. When you strike a pavement defect, the mechanical force momentarily separates these remaining strands. This is a classic case of intermittent high resistance that often escapes a simple continuity test. Experts at the ASE (Automotive Service Excellence) emphasize that visual inspections must be supplemented by ‘wiggle testing’ while monitoring circuit voltage to catch these invisible fractures before they result in a total harness replacement.
Can an Over-Tightened Zip Tie Actually Cause Your Dashboard to Flicker?
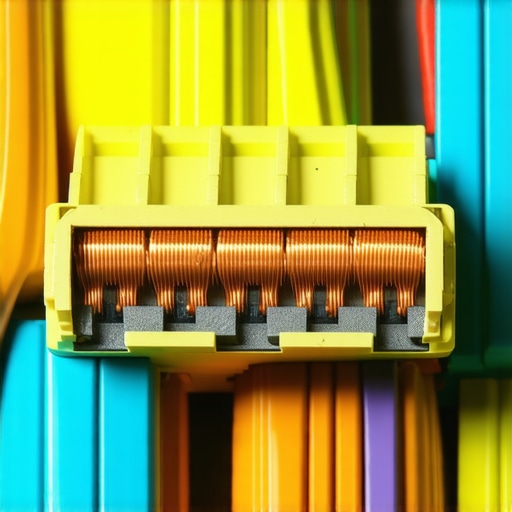
Surprisingly, yes. In the pursuit of ‘clean’ engine bays, many DIYers and even some entry-level technicians over-cinch zip ties until they bite into the wire loom. This creates a rigid pivot point that concentrates all mechanical energy into a single millimeter of wire. When the vehicle encounters a vertical G-load from a bump, the wire cannot distribute the flex across its length, causing the internal copper to work-harden and snap. This phenomenon is particularly common in high-vibration environments like diesel engine compartments or modified off-road suspensions. To prevent this, always leave enough ‘slack’ for the harness to move naturally, or use specialized automotive ‘stand-off’ clips designed to dampen road shock rather than fighting it. Maintaining this mechanical suspension of your wiring is as important as the car’s actual suspension for electronic longevity.
The Deadly Sin of Wire Piercing During Diagnosis
When searching for the source of a flicker, the temptation to use a piercing probe to tap into a wire is high. However, this is a fatal mistake for long-term reliability. Piercing the insulation creates a microscopic entry point for moisture and road salt. Through a process known as capillary wicking, corrosion can travel several feet inside the insulation, turning the copper into a green, non-conductive powder. This ‘wicking’ often leads to the very symptoms you were trying to solve. Instead, professional technicians utilize back-probing techniques, where a thin needle is inserted into the rear of the connector to touch the terminal without damaging the weather-tight seal. Using top auto repair techniques like back-probing ensures that your auto repair efforts don’t introduce new, more complex failures later.
Stop Relying on Multimeters for Transient Events
A standard Digital Multimeter (DMM) is an incredible tool, but it has a significant limitation: the refresh rate. Most DMMs sample voltage only a few times per second. If your dashboard flickers for 10 milliseconds when you hit a bump, the meter will likely smooth out the reading, showing a steady 12.6 volts even while the system is failing. To catch a ‘glitch’ in the matrix, you need an automotive oscilloscope. By graphing voltage over time, an oscilloscope allows you to see the exact moment the ‘noise’ enters the circuit. If you see a ‘sawtooth’ pattern on the power rail during an impact, you have confirmed that the issue is a physical disconnect and not a software-driven reboot of the vehicle diagnostics system. This level of precision is why professional car service is often required for modern multiplexed electrical systems.
Don’t Let Aftermarket Accessories Corrupt Your Data Bus
Finally, consider what you have added to your car recently. Aftermarket dashcams, remote starters, or ambient lighting kits often use ‘T-taps’ or ‘vampire clips’ that compromise the integrity of the factory harness. If these accessories are tapped into the same power feed as your instrument cluster, their own internal capacitors or loose connections can feedback electrical noise into the dash during a bump. If you’ve been chasing a flicker, try disconnecting any non-factory electronics to see if the ‘ghost’ disappears. Maintaining a clean electrical environment is paramount for the stability of modern transmission and body control networks. Have you recently installed any new gadgets? Sharing your setup in the comments might help others identify similar interference patterns, or you can check our guide on how to test your car battery with a simple headlight trick to rule out basic power supply issues first.
Expert Insights & Advanced Considerations
Catching Millisecond Glitches Before They Cost Thousands
Standard digital multimeters are often insufficient for diagnosing vibration-induced flickers because their sample rate is too slow to register a 10-millisecond drop. True mastery of vehicle diagnostics requires the use of an oscilloscope to visualize the voltage wave. When you see a sharp vertical drop in the signal following a physical impact, you have confirmed a mechanical separation within the circuit rather than a software-driven reset. Understanding the hidden world of vehicle diagnostics helps you avoid the common trap of replacing expensive modules when the fault is actually a 50-cent terminal pin.
Why Visual Checks Are The Biggest Lie in Auto Repair
A terminal that looks shiny and clean can still be a failure point if it lacks proper ‘pin tension.’ Expert technicians perform a terminal drag test to ensure the female socket effectively grips the male pin. If the connection is loose, road vibration will cause the circuit to open momentarily, regardless of how much dielectric grease you apply. This is one of the most overlooked top auto repair techniques that separates professional results from DIY guesswork. Always prioritize mechanical integrity over visual cleanliness when chasing ghost electrical issues.
Strip Away the Gadgets Before You Cut the Wires
Aftermarket accessories like dashcams and remote starters are notorious for introducing noise into the CAN bus. If these devices are poorly grounded, a pothole can cause a momentary surge that confuses the Body Control Module. Before committing to deep harness surgery, disconnect non-factory electronics to see if the flickering persists. This simple step can unlock your car’s potential for reliable operation without needing a complete electrical overhaul.
Curated Expert Resources
ASE (Automotive Service Excellence) Electrical Standards
The gold standard for technician certification provides deep insights into low-resistance circuit maintenance and proper grounding procedures essential for modern multiplexed vehicles.
SAE International Technical Papers
For those looking to understand the physics of wire fatigue and connector vibration, SAE offers peer-reviewed research on how automotive electrical architectures withstand mechanical G-loads.
iATN (International Automotive Technicians Network)
A professional-grade repository of real-world case studies where technicians share complex ‘glitch’ resolutions involving intermittent power loss and harness chafing.
Final Expert Perspective
Identifying why your dashboard lights flicker when you hit a bump requires moving beyond basic part-swapping and adopting a forensic mindset. The problem is rarely a failing component and almost always a failure of the physical path—be it a loose ground, a stretched terminal, or a fractured wire hidden inside its insulation. By applying advanced electrical short finding methods and verifying terminal tension, you can stabilize your vehicle’s digital network. If you have ruled out the basics and the flicker remains, it is time to test your car battery and main power feeds under load to ensure your car’s electrical foundation is sound. We invite you to share your diagnostic success stories or specific trouble codes in the comments to help our community master these complex electrical mysteries.