Professional vehicle diagnostics requires more than just reading digital trouble codes; it involves a forensic analysis of fluid integrity and chemical stability. When a technician pulls a dipstick and finds a light brown, creamy substance resembling a chocolate milkshake, we are witnessing a catastrophic chemical emulsion of engine oil and ethylene glycol. This intermix is not merely a mechanical mess; it represents a fundamental breakdown of the lubrication system’s ability to protect high-friction surfaces from thermal and mechanical failure. In the sophisticated world of advanced vehicle diagnostics, this visual indicator confirms a breach in the structural boundary between the cooling system and the high-pressure lubrication circuit, necessitating immediate cessation of engine operation.
Stop Driving When the Dipstick Shows an Emulsion
Operating an internal combustion engine with contaminated oil is a guaranteed path to bearing seizure and total block destruction. Motor oil is engineered to be incompressible and thermally stable, but once mixed with water-based coolant, its viscosity collapses instantly. This creates a thick slurry that the oil pump cannot effectively move through the narrow galleries of the engine block. The resulting metal-on-metal contact at thousands of revolutions per minute will liquefy rod bearings in a matter of miles. Before assuming the engine is a total loss, savvy owners often look for the easy way to check for a blown head gasket at home to verify the severity of the internal breach. According to research published by SAE International (Society of Automotive Engineers), even a 0.5% concentration of coolant in engine oil can significantly increase the wear rate on journal bearings by stripping away the lead-indium overlays.
Why Does Coolant Turn Engine Oil Into a Thick Slurry?
The characteristic “milkshake” appearance is the result of high-speed mechanical agitation of two normally immiscible fluids. As the crankshaft rotates, it acts like a giant whisk, whipping the oil and coolant together to create a stable emulsion. This process is chemically assisted by the detergents and dispersants already present in modern synthetic oils, which inadvertently act as emulsifying agents. If you suspect an internal leak but the oil on the dipstick still looks clean, utilizing the 30-dollar tool that lets you see inside your engine can help you inspect the combustion chamber for signs of “steam cleaning,” a classic symptom of coolant entering the cylinders.
The Mechanics of Head Gasket Breach and Oil Cooler Failure
While the cylinder head gasket is the most frequent suspect, modern car service professionals know that oil-to-water heat exchangers are increasingly common failure points in European and late-model domestic vehicles. A pinhole leak in the internal radiator of the oil cooler allows higher-pressure oil to enter the cooling system during operation, or coolant to seep into the oil pan once the engine is turned off and the oil pressure drops. This phenomenon is distinct from the “strawberry milkshake” seen in transmission failures, which typically indicates a breach in the transmission fluid cooler located inside the main radiator. Identifying the specific crossover point is the difference between a simple cooler replacement and a five-thousand-dollar engine rebuild.
How to Tell if It’s Just Condensation or a Fatal Leak
It is important to distinguish between terminal fluid intermix and simple atmospheric condensation. Short-trip driving in cold weather can produce a yellowish-white residue under the oil filler cap because the engine never reaches a sufficient operating temperature to evaporate moisture. However, if the actual dipstick is covered in a frothy, opaque tan liquid, you are facing a pressurized leak that requires professional intervention. If you are currently seeing these symptoms and need a definitive diagnosis, we invite you to reach out for a professional consultation with our master technicians to evaluate your engine’s health.
Detecting the source of a fluid intermix requires more than just a cursory glance at the dipstick. Once you identify the presence of the dreaded milkshake consistency, the next logical step involves a systematic pressure test of the cooling system. By applying a steady 15 to 18 psi to the radiator or expansion tank, a technician can often force coolant through the breach, making it visible even if the engine isn’t running. This is critical because some leaks only manifest when the system is fully pressurized, explaining why your engine temperature spikes only while waiting at red lights despite appearing normal at highway speeds. If the pressure drops but no external leaks are visible, the coolant is almost certainly migrating into the oil pan or the combustion chambers.
Find the Breach with a Cooling System Pressure Test
A precision pressure test is the frontline defense against misdiagnosis. While many DIYers focus solely on the head gasket, a professional-grade pressure test can reveal cracks in the cylinder head itself or a porous engine block casting. During this phase, it is also wise to inspect the periphery of the cooling system for secondary failures. Oil contamination is incredibly destructive to rubber components; the petroleum-based oil causes standard EPDM radiator hoses to swell and soften, leading to an eventual burst. While you are under the hood, using the 12-dollar tool that finds every vacuum leak in minutes can help rule out manifold-related issues that might mimic some head gasket symptoms, such as a rough idle or lean codes.
Will a Combustion Leak Detector Save You from a Teardown?
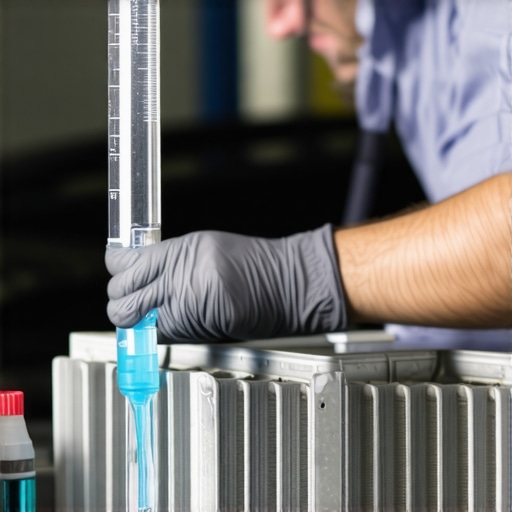
For many car owners, the most definitive way to confirm a head gasket failure without removing the cylinder head is the chemical block test. This tool uses a specialized blue fluid that reacts to carbon dioxide. If the fluid turns yellow or green while being held over the open radiator neck, it confirms that exhaust gases are bubbling into the cooling system—a hallmark of a compromised combustion seal. ASE (Automotive Service Excellence) technical guidelines state that these chemical tests are nearly 99% accurate for identifying exhaust-to-coolant breaches, though they may not detect a simple oil-to-coolant leak in an oil cooler. Leveraging top auto repair techniques every car owner should know, such as combining chemical tests with cylinder leak-down tests, provides a 360-degree view of the engine’s internal integrity.
Why the Radiator and Hoses Need Attention After the Oil Mix
Even after the primary leak is fixed—whether it was a head gasket or a faulty thermostat housing causing overheating—the job isn’t finished. If the oil-coolant emulsion reached the radiator, it will coat the narrow cooling fins with a thick, insulating sludge. This significantly reduces the radiator’s heat-exchange efficiency. You must use a heavy-duty degreaser or a dedicated cooling system flush to strip away the oil film. Failure to do so can lead to chronic overheating, potentially causing how to fix a stuck thermostat to become a recurring search in your browser. The chemical interaction between the oil and the internal seals of the water pump can also lead to premature seal failure, turning a single repair into a series of cascading cooling system issues. If you have ever had to deal with a messy cooling system cleanup, leave a comment below with your best tips, or share this article with someone currently battling a mystery coolant loss.
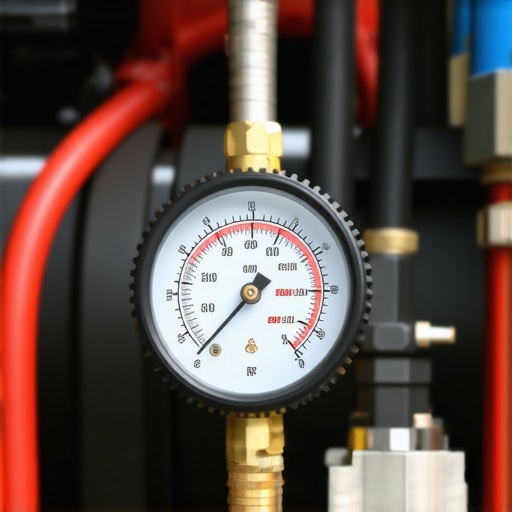
While the cooling system pressure test identifies if a leak exists, it often fails to tell you exactly where the breach is located. To move from a general diagnosis to a surgical repair, master technicians rely on a cylinder leak-down test. This procedure involves rotating each piston to top dead center on its compression stroke and injecting compressed air into the spark plug or injector hole. If you see bubbles rising in the radiator neck during this process, you have successfully isolated the specific cylinder where the head gasket or head casting has failed. This level of precision is vital for advanced vehicle diagnostics because it prevents the unnecessary replacement of healthy components while ensuring the actual culprit is addressed.
What Happens When Air Bubbles Appear in the Radiator During a Leak-Down Test?
The appearance of air bubbles or a rising fluid level in the radiator during a leak-down test is the definitive sign of a compromised combustion seal. It indicates that the path between the combustion chamber and the water jacket is open, allowing high-pressure air to migrate into the cooling system. If the air is accompanied by a hissing sound from the oil filler cap, it suggests that the compression is also leaking past the piston rings or through a crack in the cylinder wall into the crankcase. To get a better look at these internal fractures without a full teardown, consider the 30-dollar tool that lets you see inside your engine to inspect the cylinder walls for vertical scoring or heat-related discoloration.
Why Straight-Edge Measurements Save Your Machine Shop Bill
Once the cylinder head is removed, the next technical challenge is determining if the mating surface is still true. Aluminum cylinder heads are highly susceptible to warping when exposed to the extreme heat of a coolant-loss event. Using a precision machinist’s straight-edge and a set of feeler gauges, you must check for flatness across the longitudinal, transverse, and diagonal planes of the head. Most manufacturers allow for a maximum warpage of only 0.002 to 0.004 inches. If the gap exceeds these tolerances, the head must be sent to a machine shop for resurfacing. Skipping this step is a common mistake in car service that leads to immediate failure of the new gasket. If your vehicle is exhibiting these symptoms, don’t wait for a total breakdown; schedule a comprehensive leak-down evaluation to pinpoint the exact failure point.
Salvage Your Heater Core from the Slurry
One of the most frequently overlooked victims of the “milkshake” phenomenon is the heater core. Because the heater core consists of incredibly narrow tubes, the thick oil-coolant emulsion acts like a plug, often resulting in a complete loss of cabin heat even after the engine has been repaired. The chemical complexity of this sludge makes it resistant to standard water flushes. According to the ASTM D3306 standards for glycol-based coolants, the additives designed to prevent cavitation are significantly neutralized when organic acids from combustion gases or petroleum-based oils enter the mixture, leading to rapid corrosion of the thin aluminum walls within the core. This is why a specialized alkaline-based flushing agent is required to break the molecular bond of the oil before it hardens into a permanent obstruction.
Effectively restoring the cooling system’s thermal efficiency requires multiple flush cycles with a high-detergent solution. Professional technicians often use a pulsating flush tool that combines air and water pressure to dislodge the emulsion from the furthest reaches of the heater core and the engine block’s rear cooling passages. This step is non-negotiable; even a small amount of residual oil will continue to degrade new rubber hoses and can cause the new thermostat to stick in the closed position. When performing these deep cleans, monitoring the pH levels of the final rinse water ensures that no acidic or overly alkaline residue remains to eat away at the new gaskets. This attention to chemical balance is what separates a temporary patch from a long-term engine restoration.
Beyond the physical cleanup of the lubrication system, a truly professional restoration must address the invisible electrical environment within the engine block. A phenomenon known as electrolysis often acts as the silent catalyst for repeated head gasket failures. When engine grounds become corroded or loose, the cooling system can inadvertently become the path of least resistance for returning electrical current. This stray voltage transforms the coolant into an electrolyte, causing rapid galvanic corrosion that eats through aluminum cylinder heads and gasket fire rings from the inside out. Technicians specializing in advanced vehicle diagnostics utilize a digital multimeter to check for any voltage exceeding 0.3V in the coolant, a threshold that signals an imminent chemical assault on your engine’s structural integrity.
Stop Letting Electrolysis Eat Your New Head Gasket
Identifying the root cause of a breach means looking past the gasket itself to the grounding straps and battery cables. If these components are neglected, even the highest quality multi-layer steel (MLS) gasket will eventually succumb to localized pitting. This is particularly prevalent in modern vehicles with high electrical loads and complex sensor arrays. By ensuring a perfect ground path, you effectively neutralize the electrochemical reaction that leads to premature cooling system degradation. While you are refining the engine’s electrical health, it is also the perfect time to use the 12-dollar tool that finds every vacuum leak in minutes to ensure the air-fuel ratio is perfectly balanced, preventing the lean-run conditions that spike combustion temperatures and stress the new seals.
Replace Your Head Bolts or Face the Consequences
One of the most critical errors in a top-end rebuild is the reuse of torque-to-yield (TTY) cylinder head bolts. These fasteners are designed to be stretched into their plastic zone during initial installation, providing a consistent clamping force across the entire mating surface. Once stretched, they lose their elasticity and cannot provide the same tension a second time. Attempting to reuse them often results in uneven clamping, leading to a localized gap that will blow the new gasket within weeks. Every reputable car service protocol dictates that new TTY bolts must be used, accompanied by a calibrated angle-torque meter to reach the precise manufacturer specifications. #IMAGE_PLACE_HOLDER_D#
What Happens if Your Engine’s pH Stays Acidic?
Even after multiple flushes, residual combustion gases can leave the cooling system in a highly acidic state. If the pH level drops below 7.0, the coolant becomes aggressive toward the very metals it is designed to protect. Professionals use specialized test strips to verify that the system has returned to a slightly alkaline state, typically between 8.5 and 10.5. If the pH remains low, it indicates that either the flush was insufficient or there is a secondary crack in the block still introducing exhaust gases into the water jacket. To rule out these micro-fractures, the 30-dollar tool that lets you see inside your engine can be used to inspect the internal water jackets for hairline cracks that only open under thermal expansion.
Validate Your Repair with a Post-Operative Oil Analysis
The final stage of a high-level engine recovery involves scientific verification of the internal wear. A single oil change is rarely enough to remove 100% of the coolant contaminants lodged in the lifters and oil galleys. According to the specialized analysts at Blackstone Laboratories, performing a Used Oil Analysis (UOA) approximately 500 miles after the repair is the only definitive way to ensure that copper, lead, and tin levels are trending downward. This analysis detects the chemical signature of bearing wear that the naked eye cannot see. If you want to ensure your engine’s longevity after a major failure, we encourage you to reach out for a professional consultation to discuss advanced monitoring and preventive maintenance strategies that keep your vehicle on the road for the long haul.
Expert Insights & Advanced Considerations
Catch Leaks That Only Appear at Operating Temperature
Many technicians fail to find a head gasket breach because they test a cold engine. Thermal expansion is a prerequisite for many hairline fractures to open up. If a standard pressure test fails, re-running it while the block is at peak temperature reveals the true culprit. This level of precision is why advanced vehicle diagnostics require patience and simulated operating conditions.
Don’t Let Stray Voltage Melt Your New Gasket
Electrolysis is a silent killer in modern aluminum engines. If your grounds are weak, the cooling system becomes an accidental electrical return path, leading to rapid pitting of the head surface. Always check your voltage drop across the engine grounds to protect your investment in top auto repair techniques.
Replace Every Hose Touched by Oil Sludge
Petroleum products are the enemy of EPDM rubber. Even if a radiator hose looks fine after a flush, its molecular structure has been compromised by the oil. To avoid a burst hose months later, proactively replace the primary cooling lines. If you are managing costs, follow guides on how to fix a stuck thermostat to handle minor parts, but never gamble on oil-soaked rubber.
Curated Expert Resources
SAE International Technical Papers: These provide engineering-grade data on bearing wear when lubricants are contaminated with glycols, essential for understanding why immediate engine cessation is required.
Blackstone Laboratories Oil Analysis: A vital resource for post-repair verification. Their spectral analysis finds microscopic traces of coolant that indicate a lingering or secondary leak.
ASE Test Prep Manuals: Specifically the A1 (Engine Repair) series, which details the industry-standard procedures for pressure testing and head surface evaluation.
ASTM D3306 Standards: The definitive guide on coolant chemical properties, helping you understand why pH balance is critical for preventing internal corrosion after an emulsion event.
Final Expert Perspective
Resolving an oil and coolant intermix is a test of forensic skills rather than just a mechanical repair. By moving beyond the initial cleanup and focusing on the underlying causes—like electrolysis, thermal warpage, and improper clamping force—you ensure a repair that lasts the life of the vehicle. Effective car service is not just about stopping the leak; it is about restoring the chemical and mechanical equilibrium of the entire powertrain. If you are facing a complex diagnostic challenge or want to verify the health of your engine, we encourage you to reach out for a professional consultation to secure your vehicle’s future.