The integrity of an internal combustion engine’s upper seal often dictates the longevity of its peripheral electronics. When a valve cover gasket loses its elasticity—a process known in materials science as ‘compression set’—the resulting seepage does more than create an unsightly engine bay. It risks oil-fouling ignition coils and creating fire hazards on exhaust manifolds. From a professional auto repair perspective, executing a replacement in under an hour isn’t about rushing; it’s about a sequenced workflow that prioritizes surface preparation over brute force. This guide dissects the technical nuances of the process to ensure a factory-grade seal in a fraction of the time typically quoted by generalist shops.
Stop the Seepage Before It Ruins Your Ignition Coils
Advanced vehicle diagnostics suggest that many ‘leaks’ are actually the result of excessive crankcase pressure. Before cracking the bolts, ensure your PCV (Positive Crankcase Ventilation) system is breathing. If the pressure has nowhere to go, even a brand-new gasket will fail within months. This is why a comprehensive car service should always include a check of the vacuum system. Once the diagnostic phase is complete, the 60-minute clock starts with the removal of the decorative plastic covers and the careful labeling of electrical connectors. [image_placeholder_1]
Does a Liquid Gasket Maker Actually Help or Just Make a Mess?
Experienced technicians often debate the use of RTV (Room Temperature Vulcanizing) silicone on rubber gaskets. The expert consensus, supported by technical service bulletins from professional bodies like the Society of Automotive Engineers (SAE), is that RTV should be applied sparingly, and only at specific ‘half-moon’ junctions or sharp corners where the gasket must navigate the camshaft caps. Over-applying sealant can lead to excess material breaking off into the oiling system, potentially clogging narrow oil passages or oil pump pickups. Using high-quality components ensures the longevity of your repair, much like how specific fixes for transmission troubles require precise parts rather than universal solutions.
Mastering the Mating Surface for a Lasting Seal
The secret to a rapid turnaround lies in the cleanup phase. Use a plastic scraper rather than metal to avoid scoring the aluminum cylinder head; even a microscopic scratch can provide a capillary path for synthetic oil to escape under pressure. Clean the surfaces with a lint-free cloth soaked in high-grade solvent to ensure a completely dry, oil-free environment. Proper torque sequencing is the final pillar of the 60-minute repair. Most valve covers require a spiral pattern starting from the center and moving outward. This ensures the gasket is flattened evenly, preventing the ‘wave’ effect that leads to premature failure. Without a calibrated torque wrench, even the most skilled tech is guessing. Over-tightening is a common amateur mistake that crushes the gasket and warps the cover. Are you looking to deepen your mechanical knowledge or find a trusted partner for complex repairs? Explore our expert analysis on top auto repair techniques to stay ahead of your vehicle’s maintenance needs.
Stop Drowning Your Ignition Coils in Standing Oil
One of the most overlooked aspects of a rapid gasket replacement is the condition of the spark plug tube seals. When these internal rings fail, they allow engine oil to flood the spark plug wells, effectively submerging the ignition coil boots. This saturation leads to carbon tracking and insulation breakdown, which is often the root of why your car hesitates when you step on the gas. Simply replacing the outer perimeter gasket without addressing these inner seals is a recipe for a return of the ‘Check Engine’ light. Before installing the new set, use a dedicated solvent to clean every drop of oil from the spark plug tubes. If the coils have already been compromised by long-term oil exposure, you can test a coil pack with a simple spark plug tool to see if the oil has permanently shorted the internal windings.
Is Your Replacement Failing Because of a Warped Cover?
In the era of lightweight engineering, many manufacturers have transitioned from cast aluminum to composite plastic valve covers. While these offer weight savings, they are highly susceptible to thermal warping over 100,000 miles. An expert technician knows that if a cover has experienced significant heat cycles while the gasket was hard and brittle, the plastic itself may no longer be true. Putting a flat gasket onto a curved surface is a futile exercise. Use a straight edge to check the cover’s flatness across its length; if it deviates by more than a few thousandths of an inch, the entire cover must be replaced. This is often the hidden reason your engine is consuming oil without a leak reaching the pavement—the oil is being sucked into the intake through a warped seal at the back of the cylinder head.
Identify Secondary Failures Before Reassembly
A 60-minute repair window remains achievable only if you don’t have to backtrack for forgotten diagnostics. Before the new gasket is seated, take a moment to inspect the valvetrain for sludge or varnish buildup. Excessive golden-brown staining suggests extended oil change intervals, which can lead to clogged PCV baffles within the valve cover itself. The Car Care Council emphasizes that preventative gasket replacement can save thousands in oxygen sensor and catalytic converter repairs by preventing persistent oil-induced misfires that dump raw fuel into the exhaust. If you are dealing with an older vehicle with an OBD-I system, learning how to pull engine fault codes using only a paperclip can provide a quick baseline of your sensor health before you start disassembly. This ensures that the ‘fixed’ car doesn’t still have underlying electronic issues.
The Material Science of a Better Seal
Not all replacement gaskets are created equal. While Nitrile (Buna-N) is common, seeking out Viton or high-temperature fluoropolymer gaskets provides significantly better resistance to the aggressive additives found in modern synthetic oils. These materials maintain their ‘memory’—the ability to spring back and seal—even after years of high-heat exposure. When you are sourcing parts, don’t settle for the cheapest option at the local parts store; look for ‘Problem Solver’ series gaskets that are often slightly thicker to account for older, imperfect mating surfaces. If you’re unsure whether your leak is a simple gasket or a more complex internal pressure issue, consider choosing the right car service for seamless vehicle maintenance to get a professional evaluation that looks beyond just the superficial leaks.Navigating the removal of decades-old fasteners requires a tactile sensitivity that no digital torque wrench can replicate. When working on aluminum heads, the risk of ‘galling’—where the bolt threads literally weld themselves to the head—is a constant threat. Applying a penetrating catalyst hours before the job isn’t just a suggestion; it’s a defensive maneuver. If a bolt resists, a quick shock with a dead-blow hammer on the head of the bolt can often break the stiction without snapping the shank. Many DIYers overlook this, leading to the dreaded ‘easy-out’ scenario that turns a simple maintenance task into a professional car service intervention.
Can a Change to Synthetic Oil Cause a Valve Cover Leak?
This is a common point of contention in enthusiast circles. According to ASTM International, which sets the standards for petroleum products and elastomeric materials, modern synthetics have high-detergency packages that effectively ‘scrub’ the engine. On a high-mileage vehicle, sludge and carbon deposits might be the only things holding back a leak. When synthetic oil removes those deposits, it exposes the already-shrunken gasket. The oil didn’t cause the leak; it merely revealed the failure that was already there. If you notice a sudden drip after an oil change, it’s a clear signal to check our guide on vehicle diagnostics to confirm the source.
Seal the T-Joint Where the Timing Cover Meets the Head
Even the most expensive Viton gasket will fail if you ignore the ‘T-joint’—the intersection where the engine block, the cylinder head, and the front timing cover all meet. This area has three different thermal expansion rates fighting against each other. Without a pea-sized dab of high-temp RTV at these precise points, capillary action will draw oil through the microscopic gap between the components. 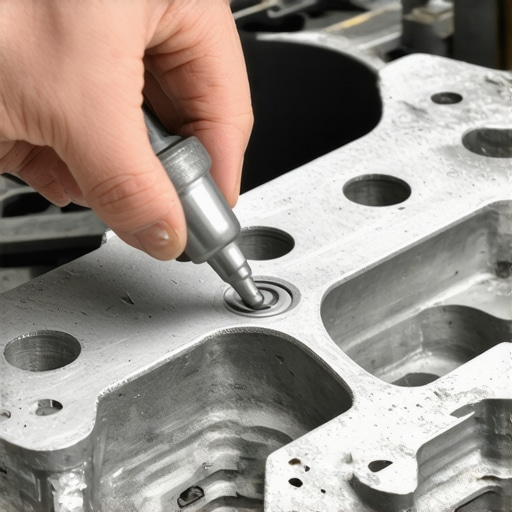 This is a critical step often missed in expert auto repair tutorials, leading to the frustrating ‘mystery leak’ that appears only when the engine is under load.
Why High-Mileage Additives Are Not a Substitute for Rubber
Many owners attempt to solve gasket issues with ‘stop-leak’ additives. These chemicals work by using esters to swell the rubber of the seals. While this might temporarily stop a weep, it also softens the rubber to the point of losing its structural integrity. Over time, the seal becomes ‘mushy’ and can actually blow out under crankcase pressure. This is a temporary fix that often complicates future repairs by leaving a gummy residue throughout the oiling system. For those dealing with persistent drivetrain issues, understanding the difference between a superficial fix and a deep-system repair is vital—much like how transmission troubles require more than just a fluid additive to solve mechanical wear.
The Role of Surface Finish in Gasket Retention
When you look at an aluminum cylinder head under a microscope, it looks like a mountain range. The goal of the gasket is to ‘conform’ into these valleys. If you use an abrasive ‘cookie’ wheel on a die grinder to clean the surface, you are likely creating low spots that no rubber can fill. Professional engine builders prefer a precision-machined flat surface with a specific RA (Roughness Average) value. If the surface is too smooth, the gasket can actually ‘squish’ out of place because there is no mechanical friction to hold it in place during the torque sequence. This is particularly problematic on the curved ‘humps’ where the gasket passes over the camshaft seals. These areas require a balance of friction and compression to remain oil-tight as the engine vibrates at high RPM. Without proper surface prep, the gasket can literally ‘walk’ out of its channel
Don’t Let Thermal Expansion Ruin Your Hard Work
When dealing with a high-performance or high-mileage engine, the coefficient of thermal expansion becomes your greatest adversary. As the cylinder head heats up, it expands at a different rate than the valve cover bolts, especially if you are mixing steel fasteners with an aluminum head. This variance can lead to ‘bolt stretch’ or, conversely, the loosening of fasteners over thousands of heat cycles. To counteract this, expert technicians often employ a retorque procedure after the first few heat cycles, though this is rarely mentioned in basic manuals. Ensuring that the shoulder bolts—those specifically designed with a metal sleeve to prevent over-compression—are still within their factory length specification is vital. If the built-in spacers have compressed the valve cover material itself, no amount of torque will achieve the necessary clamping force. This is a primary reason why high-end auto repair involves checking the integrity of the bolt grommets, which act as miniature shock absorbers for the cover.
Is the Real Culprit a Restricted Oil Return Path?
A common frustration for even seasoned mechanics is a recurring leak despite using premium gaskets and perfect torque. In these cases, the issue often isn’t the seal, but the hydrostatic pressure building up within the cylinder head. If the oil return galleries—the ‘drains’ that allow oil to flow back into the oil pan—are partially restricted by sludge or carbon, the oil levels in the head rise too high. This submerges the gasket line in standing oil rather than just a light mist. According to technical data from the AERA Engine Builders Association, maintaining clear oil return paths is as critical as the gasket itself for preventing long-term seepage. If you find heavy varnish during your 60-minute swap, a professional engine flush may be necessary to ensure the new seal isn’t immediately overwhelmed by oil pooling. 
Stop the Corrosive Creep on Magnesium Valve Covers
Many European and high-end domestic engines use magnesium alloy valve covers to shed weight. However, magnesium is highly susceptible to galvanic corrosion when it comes into contact with moisture and salt, especially at the gasket mating surface. If you notice a white, powdery residue or pitting on the cover’s edge, a simple cleaning won’t suffice. The pits must be filled or the surface machined, as these microscopic craters provide a bypass for pressurized oil. When performing vehicle diagnostics on these engines, always check for ‘out-of-round’ bolt holes, which suggest the cover has been over-stressed. Applying a specialized dielectric or anti-corrosive coating to the mating surface can prevent future oxidation and preserve the integrity of your car service.
Validate Your Success with a Post-Repair Smoke Test
The final step in a truly professional gasket replacement is verifying the vacuum integrity of the entire crankcase. A modern engine is designed to operate under a slight vacuum to pull blow-by gases into the intake. If your gasket replacement has even a pinhole leak, it introduces ‘unmetered air’ into the system, which can lean out the fuel mixture and cause a rough idle. By using a professional smoke machine to pressurize the intake manifold, you can instantly see if any wisps of smoke escape from the newly installed gasket or the PCV junctions. This level of precision ensures that you aren’t just stopping an oil drip, but maintaining the delicate balance of the engine’s air-fuel ratio. If your vehicle continues to exhibit odd behavior after a successful seal, it may be time to dive deeper into our analysis of transmission troubles or other drivetrain complexities that could be masquerading as engine issues. Ready to ensure your vehicle is performing at its absolute peak? Don’t stop at the surface—examine every component of your engine’s health with our specialized maintenance guides.
Expert Insights & Advanced Considerations
Check the Breather Before the Bolts
A recurring leak is rarely a failure of the rubber itself but rather a symptom of internal pressure. If your PCV valve is stuck, the crankcase becomes a pressure cooker, forcing oil through even the most perfect seal. Before starting any work, perform vehicle diagnostics to ensure the vacuum system is pulling gases correctly. This simple check prevents you from doing the same job twice in six months.
Why You Should Skip the Parts Store Bargains
Standard Nitrile gaskets are prone to hardening within two years of high-heat cycles. When you unlock your car’s potential with high-grade Viton replacements, you are investing in a material that maintains elasticity up to 400 degrees Fahrenheit. The cost difference is negligible compared to the labor of a premature re-do.
Plastic Scrapers Save Your Cylinder Head
Metal razor blades are the enemy of aluminum mating surfaces. A microscopic gouge creates a high-pressure bypass for oil that no sealant can fully bridge. Use a stiff plastic scraper and specialized chemical dissolvers to achieve a silver-clean surface. This meticulous prep often identifies the hidden reason your engine is consuming oil without a leak reaching the ground, such as oil seeping into plug wells due to poor surface contact.
Smoke Test Your Work to Verify the Seal
Precision isn’t just about torque; it’s about vacuum integrity. Using a smoke machine after reassembly confirms that no unmetered air is entering the head. This prevents the lean-run codes that often plague DIY repairs and ensures your idle stays rock-solid. [image_placeholder_1]
Curated Expert Resources
ASE Engine Repair Study Guide
This resource provides the industry standard for sealing techniques and fastener physics, essential for anyone moving from hobbyist to professional-level maintenance.
Alldata Technical Service Bulletins
Subscription access to TSBs allows you to see if your specific engine model has a known defect, such as a factory-warped cover design that requires more than just a new gasket.
AERA Engine Builders Association
Accessing AERA technical data offers specific torque-to-yield specs and surface RA recommendations that go beyond generic manual data.
Final Expert Perspective
Executing a 60-minute valve cover swap requires more than speed; it demands a technical awareness of pressure, surface finish, and material science. When you approach auto repair with this level of detail, you transform a routine task into a long-term reliability upgrade. If you have successfully sealed your upper engine but still notice hesitation or shifting issues, investigate transmission failures decoded to ensure your entire drivetrain is operating at peak efficiency. We invite professional readers to share their specific torque success stories or surface prep tips to help others maintain their vehicles better.