The Anatomy of a Persistent Cabin Illumination Problem
When you close your vehicle’s door, you expect the cabin to plunge into darkness or gently fade to black. However, a stubborn interior dome light that refuses to turn off is more than a minor annoyance; it is a rapid pathway to a parasitic battery drain. Modern automotive electrical architectures rely on a delicate interplay between physical switches, body control modules (BCMs), and multiplexed communication networks. Resolving this issue requires a systematic approach to diagnostic reasoning, moving beyond guesswork to isolate the precise failure point within your vehicle’s electrical grid.
In older vehicles, the system was simple: a door jamb switch directly grounded the light circuit. Today, a door latch sensor sends a digital signal to the BCM, which then manages the dimming profile of the light via a solid-state transistor. If you are experiencing other electrical anomalies alongside this issue, understanding how to perform vehicle diagnostics is the first step toward mapping out a permanent auto repair solution. Professional technicians often utilize advanced oscilloscopes to monitor these signals, but car owners can achieve significant progress using structured diagnostic steps.
Isolating the Physical and Digital Fault Points
The Mechanical Door Latch Failure
The most common culprit behind a persistent dome light is a failing door jamb switch or an integrated latch sensor. Over time, road grime, moisture, and worn mechanical linkages prevent the latch mechanism from fully closing, leaving the sensor in a state that signals an “open door” to the vehicle\’s computer. Applying a high-quality electrical contact cleaner directly into the latch assembly can sometimes free a sticky microswitch, saving you from a costly component replacement.
The BCM and Interior Dimmer Switch Override
Before disassembling your door panels, verify that the physical dimmer switch on your dashboard has not been accidentally clicked into the “always on” override position. It is incredibly common for drivers to bump this control while cleaning the instrument cluster. If the switch is in the correct position, the problem may stem from a corrupted BCM. To investigate further, you can read about how to identify a parasitic draw using how to find a parasitic drain with a cheap multimeter to see if the control module is actively keeping the circuit energized even when all logical inputs are closed.
Why Do Interior Lights Fail to Sleep After a Door Latch Repair?
Many DIY mechanics replace a faulty door latch only to find the interior lights still refuse to turn off. This occurs because modern body control modules require a sleep cycle or a specific diagnostic reset sequence to clear historical fault codes. According to automotive electrical standards published by organizations like the Society of Automotive Engineers (SAE), some BCMs will maintain a “fail-safe” state—keeping interior circuits powered—if they detect inconsistent sensor values during self-test sequences. If your BCM is unresponsive or locked in a fault state, you may need a professional-grade scan tool to command a module reset and restore normal functionality.
If you suspect your vehicle’s electrical issues run deeper than a simple switch, exploring advanced repair strategies is highly recommended. Learn how to address complex system failures by reading our guide on expert auto repair tips for 2025 to keep your vehicle\’s electrical and mechanical systems operating at peak performance.
Tracing Ghost Ground Faults in the Cabin Wire Harness
When both the door latch microswitches and the body control module check out perfectly, the issue almost certainly lies within the physical wiring harness. A pinched wire hidden beneath the door sill plate or inside the rubber boot protecting the door-to-body hinge is a notorious hazard. If the ground return wire for the dome light circuit rubs against the sharp metal edge of the vehicle’s chassis, it creates an unintended path to ground. This bypasses all digital controls and BCM switching transistors, keeping the interior cabin permanently illuminated. Hunting down these raw copper exposure points requires patience, a wiring diagram, and a systematic visual inspection along the main harness channels.
To confirm a short-to-ground without tearing your entire interior apart, you can isolate the specific circuit by pulling its corresponding fuse. If you suspect your vehicle’s electrical issues might be wider than a single cabin circuit, learning about the 5-minute fuse check that saves you a 200 diagnostic fee is an invaluable skill that prevents unnecessary component replacement. Once isolated, a digital multimeter set to resistance (ohms) can verify if the load side of the circuit is making unwanted contact with the vehicle frame.
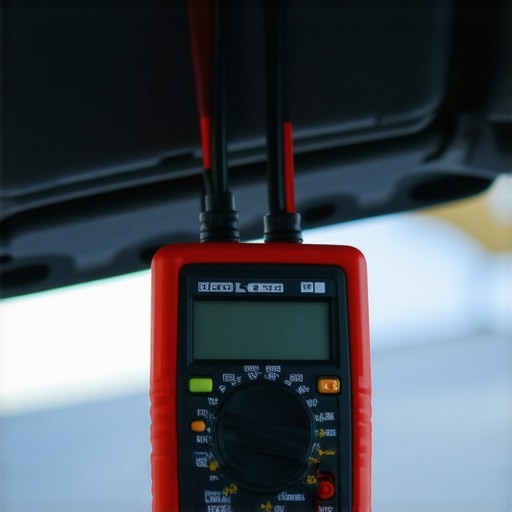
Why Does Your Dome Light Dim But Never Fully Extinguish?
This baffling phenomenon usually occurs in vehicles where incandescent bulbs have been replaced with aftermarket light-emitting diodes (LEDs). Because LEDs require significantly less current to illuminate, even a microscopic amount of residual voltage leakage from a solid-state BCM driver will cause them to glow dimly. In professional circles, this is known as “ghost current” or parasitic voltage bleed. The automotive engineering standards agency, International Organization for Standardization (ISO), notes that electronic control modules are designed with acceptable leakage current limits optimized for resistive incandescent loads. Installing a premium LED bulb equipped with a built-in CAN bus resistor, or simply reverting to the factory-specified bulb, instantly resolves this phantom illumination.
Defeating the Battery Drain Before Your Next Start
While you work to locate the exact short circuit or faulty latch sensor, preventing a completely dead battery is your top priority. If your vehicle sits for more than twelve hours with the interior lights energized, the battery’s state of charge will drop below the threshold required to spin the starter motor. To avoid being stranded, you can check out the battery terminal trick for stubborn starting issues, which can provide a temporary bypass or temporary relief when dealing with high parasitic draws. If you find yourself struggling with these complex electrical bugs, we encourage you to leave a comment below sharing your specific vehicle make and model so our community of diagnostic technicians can help you pinpoint the exact wiring harness location.
Decoding BCM Logic Gates and Sleep Mode Failures
When a vehicle’s ignition is switched off, the onboard network does not shut down immediately. Instead, various modules, including the Body Control Module (BCM), enter a temporary standby state before transitioning into a deep sleep mode. During this transition, which typically lasts between 10 to 30 minutes, the BCM continuously polls its sensor networks to ensure all security parameters are met. If a corrupted door module or a malfunctioning CAN-bus node keeps transmitting packet data, the BCM logic gates remain locked in an active state. This prevents the solid-state drivers from cutting power to the accessory delay relay, leaving your cabin lights energized and slowly destroying your battery chemistry.
How Do You Force a Stubborn BCM to Re-enter Sleep Mode?
To diagnose a BCM that refuses to shut down, technicians utilize a process known as ‘voltage drop testing’ across the vehicle’s fuses. By measuring millivolts across the fuse terminals without removing them, you can determine exactly how much current is flowing through each circuit without waking up the sleeping modules. If the circuit feeding the BCM remains active after the designated timeout period, performing a hard capacitive reset—disconnecting both battery terminals and joining them together for 10 minutes—can drain the residual charge from the module’s internal capacitors. This forces the microcontroller to reboot and reload its factory configuration parameters, often clearing temporary software loops that prevent shutoff.
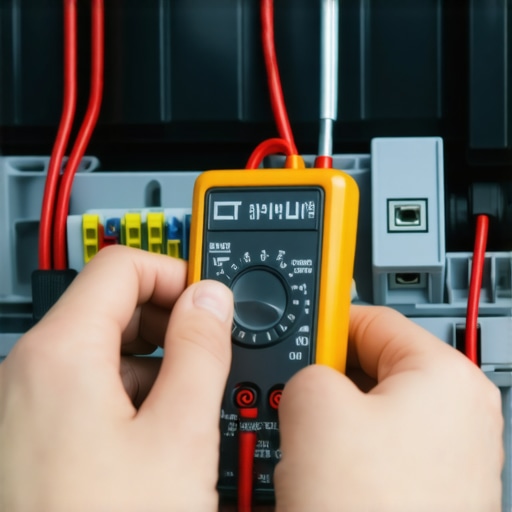
Splicing and Repairing Corroded Door Hinge Wiring Harnesses
Vehicles that experience heavy daily use frequently develop fractured wires inside the flexible rubber boot running between the driver’s door and the main body pillar. This boot undergoes extreme mechanical stress every time the door swings open or closed. Over years of service, the copper strands inside the insulation work-harden, brittle, and eventually snap. When these wires break, they can touch adjacent circuits, mimicking an ‘open door’ signal to the BCM or sending a constant 12-volt current directly to the door latch sensor switch return line.
Repairing this localized failure requires more than just wrapping electrical tape around the damaged area. A proper, lasting repair requires splicing in ultra-flexible silicone-insulated wire designed to withstand continuous bending. Using heat-shrink butt connectors lined with waterproof adhesive is essential for keeping moisture out of the newly spliced joint. According to technical bulletins from the National Institute for Automotive Service Excellence (ASE), standard vinyl crimp connectors should never be used in high-flex areas like door bellows, as they create a rigid stress point that will inevitably fail within months. If you are preparing to perform this intricate wiring fix, you can find helpful advice on tools and safety protocols in our guide on expert auto repair tips for 2025.
The Role of Smart Relays in Modern Cabin Illumination
In highly advanced vehicle architectures, traditional mechanical relays have been entirely replaced by intelligent power distribution centers containing smart high-side switches. These solid-state devices feature built-in diagnostic capabilities, including over-current protection, thermal shutdown, and open-load detection. When an aftermarket accessory is tapped into the dome light circuit, it can alter the expected resistance profile. The smart switch interprets this as a circuit fault and may lock the output ‘on’ to protect the underlying silicon wafer from inductive spikes. Understanding the behavior of these digital switches is critical before attempting any electrical customization inside the passenger cabin.
Microscopic Board Failures That Mimic Harness Shorts
When external wiring runs check out completely clean, the diagnostic trail leads directly to the printed circuit board of the Body Control Module or the junction block itself. Over years of thermal cycling, the microscopic solder joints holding the power-switching metal-oxide-semiconductor field-effect transistors (MOSFETs) to the board can develop micro-cracks. These fractures cause a high-resistance bridge, preventing the transistor from fully opening or closing. In some instances, a transient voltage spike from a failing alternator can partially blow a driver transistor, leaving it permanently gated into a conductive state. This internal silicon failure will continuously feed low-amperage current to the dome lamps, bypassing all software commands to shut down.
What causes the digital gateway to keep cabin circuits active?
A critical, often overlooked factor in modern vehicle networks is the role of the Controller Area Network (CAN) bus gateway. When you lock your vehicle, the driver door module, passenger door module, and BCM must all agree to enter sleep mode. If a single module remains awake due to a corrupted transceiver chip, it will continue to broadcast cyclic messages across the high-speed CAN bus. As long as network traffic exists, the master gateway cannot enter a low-power state, keeping the main accessory relays energized. Investigating this requires a high-quality oscilloscope to probe the CAN-High and CAN-Low lines, searching for erratic voltage signals or packet collisions that indicate a rogue module is preventing network-wide sleep.
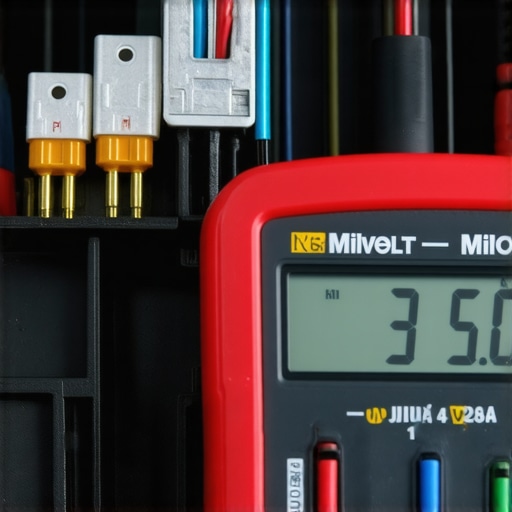
Testing Current Draws at the Junction Block with Precision
Pinpointing a parasitic drain inside a highly integrated dash fuse box requires an advanced diagnostic technique known as voltage drop testing across micro-fuses. Traditional testing methods that involve pulling fuses one by one can accidentally wake up a sleeping BCM, completely resetting the diagnostic state and masking the original fault. By placing the sharp probes of a digital multimeter set to the millivolt scale directly onto the exposed metal test points on top of a fuse, you can determine if current is actively flowing through that specific branch. Professional documentation from the Equipment and Tool Institute (ETI) outlines precise conversion charts that translate millivolt drops into actual milliampere draw, allowing you to isolate the offending branch circuit without disturbing the vehicle’s electrical network.
If you have spent hours chasing down this electrical mystery only to find yourself back at square one, do not hesitate to share your troubleshooting journey. Tell us the exact year, make, and model of your vehicle in the comments section below so our network of expert mechanics can provide targeted assistance and wiring schematics.
Expert Insights & Advanced Considerations
The Silent Threat of Micro-Amperage Gate Leakage
Many modern automotive solid-state switching components, like those found in the body control module, can experience microscopic degradation. This results in a tiny current leakage that easily powers energy-efficient aftermarket LED replacements. If you are struggling with a persistent glow, you must decide whether to return to factory-spec resistive incandescent bulbs or install inline load resistors to pull the voltage down. It is always best to perform highly detailed vehicle diagnostics to verify whether you are dealing with a software sleep cycle issue or a failing driver channel on the circuit board.
The Mechanical Stress Point Inside Door Accordion Boots
Every time a door swings open, the localized wiring harness experiences physical bending, which leads to internal copper fracturing over time. When seeking out complex open-door signal faults, you should focus on the door jamb bellows before condemning expensive electronic control units. Prioritize inspecting the ground wire shielding, as a simple pinch or break inside this rubber tube often mimics a physical door latch failure. Using the correct repair techniques here will guarantee your electrical integrity for another decade.
CAN-Bus Noise Keeps Control Modules Awake
A rogue module on the Controller Area Network can transmit persistent traffic that blocks the vehicle’s main computer network from shutting down. Even if a latch sensor is fully functional, an unrelated electronic component can keep the BCM fully awake and feeding power to the dome lights. Identifying this requires analyzing network waveforms with an oscilloscope, ensuring that packet transmission completely drops to zero during the module sleep timer interval.
Curated Expert Resources
Society of Automotive Engineers (SAE) Technical Library
This resource offers deep technical papers on multiplexed CAN-bus architectures and physical signal requirements, making it indispensable for identifying logical signal failures.
International Organization for Standardization (ISO) Automotive Specifications
ISO provides the exact electrical leakage current limits and diagnostic protocol frameworks used by manufacturer design engineers to map electronic component control.
National Institute for Automotive Service Excellence (ASE) Training Portals
This is an exceptional hub for learning specialized diagnostic pathways, wiring repair standards, and finding hands-on training to refine your real-world automotive electrical skills.
Final Expert Perspective
Conquering a stubborn, battery-draining cabin light problem requires looking beyond simple switch replacements to examine module sleep logic and wire harness physics. Whether you are dealing with a hidden ground fault in the door hinge or a BCM that refuses to enter sleep mode, structured troubleshooting is your only path to success. For those planning to dive into complex mechanical or electrical diagnostics, we suggest checking out our comprehensive collection of expert auto repair tips for 2025 to elevate your master technician skills. If you are facing a confusing electrical issue in your garage right now, please leave a comment detailing your vehicle’s symptoms so we can assist you with targeted diagnostic strategies.